
《电脑动画高级教程》(GNOMONOLOGY THE MAKING OF 'TRIN')QuicktimeMov[DVDRip]
电驴资源
| 用户共享的电驴资源列表 | |
|---|---|
| [电脑动画高级教程].GNOMONOLOGYMAKINGOFTRIN.ISO | 2.76 GB |
| 2.76 GB | |
电驴资源简介
简介:

本教程包含14个章节,共计621分钟。
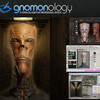
教程介绍了“Trin”这个项目的制作过程,设计,建模和渲染。
使用的软件包含Photoshop,Maya,Zbrush,UVlayout,Bodypaint 和Mental Ray。
Trin was started to create a high-res 4k still image, yet evolved to become a looping ten second animation rendered in vertical HD at 1200x1920 to be displayed on a wall-mounted digital display. Starting from a personal sketch, Trin was created in twenty hours using Photoshop, Maya, Zbrush, UVlayout, Bodypaint and Mental Ray. The entire process was recorded and is demonstrated using timelapse footage, where I explain every step with an emphasis on both the technical and aesthetic thought processes. Level: Intermediate.
Chapter One: Orthographics
Trin is based on a pre-existing design that was drawn on paper as a frontal orthographic. The first step is to generate a side-view sketch from the front view design. Using Photoshop, I design Trin s profile ensuring that it aligns perfectly with the front, while trying to create a sideview that holds true to the design. I then import the front/side images into Maya and prepare the image planes for modeling.
Duration: 26min Size: 45.84mb
Chapter Two: Base Mesh, part one
There are two ways to approach a basemesh when Zbrush is going to be involved. The first is create the simplest possible form via box-modeling. The second is to create a topological model where the edge flow follows the musculature of the design. While a Zbrush sculpt can be retopologized, if I know that the 2D design must be exactly followed, I often prefer to make a topological basemesh from the start. In this chapter, the model begins by importing a human head basemesh that I then cut up and redirect the edge flow to suit Trin s anatomy.
Duration: 61min Size: 492.47mb
Chapter Three: Base Mesh, part two
The basemesh for Trin is completed, including the coat and other details.
Duration: 54min Size: 444.73mb
Chapter Four: UV Layout
Using Headus UVlayout, the UVs for Trin and his components are flattened and then arranged in Maya. The separate elements are then exported as obj s in preparation of Zbrush import.
Duration: 27min Size: 201.15mb
Chapter Five: Zbrush, part one
The ZTL is assembled and sculpting begins on the head primarily using the Simple brush.
Duration: 28min Size: 217.73mb
Chapter Six: Zbrush, part two
Sculpting continues, with high-frequency detail added using the Rake tool. Forms are resolved using the Simple brush and Move tool.
Duration: 45min Size: 280.49mb
Chapter Seven: Shaders / Lighting
Normal maps are generated in Zbrush using Zmapper, then Trin s components are exported from Zbrush to Maya. Once in Maya, I block-in the initial shaders, normal maps, SSS and lighting. I then export a 2k render to Photoshop and create a color study.
Duration: 78min Size: 143.21mb
Chapter Eight: Texturing the Coat
Trin s coat is textured in Photoshop using scans of leather that are assembled together using the transform, warp and liquify tools.
Duration: 58min Size: 207.72mb
Chapter Nine: Texturing the Head
Trin s head is textured in Bodypaint, where I painted the color map from scratch using a texture stamping technique.
Duration: 42min Size: 87.47mb
Chapter Ten: Modeling the Hallway
The original design is very vague when it comes to the background. I interprete the sketch as being a hallway, and let myself design as I model. In this chapter the hallway geometry is finalized and lit.
Duration: 52min Size: 245.33mb
Chapter Eleven: Texturing the Hallway
Using Photoshop, the hallway is textured by overlaying many different photographic textures in order to create a grungy look. With the textures imported into Maya, the final hallway background is rendered, ready to be composited in Photoshop with Trin.
Duration: 43min Size: 154.34mb
Chapter Twelve: Photoshop Composite
With the background and foreground elements rendered at 2k, I now take them into Photoshop to develop the final look for the composite.
Duration: 32min Size: 50.78mb
Chapter Thirteen: Quickrig and Animation
With Trin s look finalized, I decided that perhaps it would be cool to create a short and simple looping animation of him that I could display on a wall mounted display. In this chapter I show how to create the skeleton, a quick lattice rig for his head and eye constraints.
Duration: 44min Size: 179.54mb
Chapter Fourteen: After Effects Composite
With the ten second animation rendered in HD as just two layers, fg +bg, I recreate the look developed in Photoshop using After Effects. The final Quicktime movie is then rendered and Trin is ready to be displayed.
Duration: 31min Size: 75.47mb
--------------------------------
[说明]
原来以为分成一个个小文件会下载得快一点,其实事与愿违。在eMule里同时给多个文件供源,反而造成相互抢占带宽的问题。所以会有很多人提出没有源。
现在把他们合并成一个文件,重新供源。请大家用新的连接下载。
--------------------------------
[通过安全测试]
杀毒软件:Symantec AntiVirus 企业版 10.1.5.5000
病 毒 库:2007.12.13
[网络共享链接]
驻服务器:Razorback 3.1/Razorback 3.0
共享时间:19:00-7:00
本教程包含14个章节,共计621分钟。
教程介绍了“Trin”这个项目的制作过程,设计,建模和渲染。
使用的软件包含Photoshop,Maya,Zbrush,UVlayout,Bodypaint 和Mental Ray。
Trin was started to create a high-res 4k still image, yet evolved to become a looping ten second animation rendered in vertical HD at 1200x1920 to be displayed on a wall-mounted digital display. Starting from a personal sketch, Trin was created in twenty hours using Photoshop, Maya, Zbrush, UVlayout, Bodypaint and Mental Ray. The entire process was recorded and is demonstrated using timelapse footage, where I explain every step with an emphasis on both the technical and aesthetic thought processes. Level: Intermediate.
Chapter One: Orthographics
Trin is based on a pre-existing design that was drawn on paper as a frontal orthographic. The first step is to generate a side-view sketch from the front view design. Using Photoshop, I design Trin s profile ensuring that it aligns perfectly with the front, while trying to create a sideview that holds true to the design. I then import the front/side images into Maya and prepare the image planes for modeling.
Duration: 26min Size: 45.84mb
Chapter Two: Base Mesh, part one
There are two ways to approach a basemesh when Zbrush is going to be involved. The first is create the simplest possible form via box-modeling. The second is to create a topological model where the edge flow follows the musculature of the design. While a Zbrush sculpt can be retopologized, if I know that the 2D design must be exactly followed, I often prefer to make a topological basemesh from the start. In this chapter, the model begins by importing a human head basemesh that I then cut up and redirect the edge flow to suit Trin s anatomy.
Duration: 61min Size: 492.47mb
Chapter Three: Base Mesh, part two
The basemesh for Trin is completed, including the coat and other details.
Duration: 54min Size: 444.73mb
Chapter Four: UV Layout
Using Headus UVlayout, the UVs for Trin and his components are flattened and then arranged in Maya. The separate elements are then exported as obj s in preparation of Zbrush import.
Duration: 27min Size: 201.15mb
Chapter Five: Zbrush, part one
The ZTL is assembled and sculpting begins on the head primarily using the Simple brush.
Duration: 28min Size: 217.73mb
Chapter Six: Zbrush, part two
Sculpting continues, with high-frequency detail added using the Rake tool. Forms are resolved using the Simple brush and Move tool.
Duration: 45min Size: 280.49mb
Chapter Seven: Shaders / Lighting
Normal maps are generated in Zbrush using Zmapper, then Trin s components are exported from Zbrush to Maya. Once in Maya, I block-in the initial shaders, normal maps, SSS and lighting. I then export a 2k render to Photoshop and create a color study.
Duration: 78min Size: 143.21mb
Chapter Eight: Texturing the Coat
Trin s coat is textured in Photoshop using scans of leather that are assembled together using the transform, warp and liquify tools.
Duration: 58min Size: 207.72mb
Chapter Nine: Texturing the Head
Trin s head is textured in Bodypaint, where I painted the color map from scratch using a texture stamping technique.
Duration: 42min Size: 87.47mb
Chapter Ten: Modeling the Hallway
The original design is very vague when it comes to the background. I interprete the sketch as being a hallway, and let myself design as I model. In this chapter the hallway geometry is finalized and lit.
Duration: 52min Size: 245.33mb
Chapter Eleven: Texturing the Hallway
Using Photoshop, the hallway is textured by overlaying many different photographic textures in order to create a grungy look. With the textures imported into Maya, the final hallway background is rendered, ready to be composited in Photoshop with Trin.
Duration: 43min Size: 154.34mb
Chapter Twelve: Photoshop Composite
With the background and foreground elements rendered at 2k, I now take them into Photoshop to develop the final look for the composite.
Duration: 32min Size: 50.78mb
Chapter Thirteen: Quickrig and Animation
With Trin s look finalized, I decided that perhaps it would be cool to create a short and simple looping animation of him that I could display on a wall mounted display. In this chapter I show how to create the skeleton, a quick lattice rig for his head and eye constraints.
Duration: 44min Size: 179.54mb
Chapter Fourteen: After Effects Composite
With the ten second animation rendered in HD as just two layers, fg +bg, I recreate the look developed in Photoshop using After Effects. The final Quicktime movie is then rendered and Trin is ready to be displayed.
Duration: 31min Size: 75.47mb
--------------------------------
[说明]
原来以为分成一个个小文件会下载得快一点,其实事与愿违。在eMule里同时给多个文件供源,反而造成相互抢占带宽的问题。所以会有很多人提出没有源。
现在把他们合并成一个文件,重新供源。请大家用新的连接下载。
--------------------------------
[通过安全测试]
杀毒软件:Symantec AntiVirus 企业版 10.1.5.5000
病 毒 库:2007.12.13
[网络共享链接]
驻服务器:Razorback 3.1/Razorback 3.0
共享时间:19:00-7:00