
《Gnomonolog》(Gnomonology - The Making Of Jester 1&2)rar[压缩包]
电驴资源
| 用户共享的电驴资源列表 | |
|---|---|
| Gnomonology.-.The.Making.Of.Jester.1&2.rar | 4.44 GB |
| 4.44 GB | |
电驴资源简介
中文名: Gnomonolog英文名: Gnomonology - The Making Of Jester 1 2资源格式: 压缩包版本: rar发行时间: 2007年地区: 美国对白语言: 英语文字语言: 英文简介:

这个好像没有人发过,我也是刚搞到得,
发上来和大家共享一下好了,由于网速原因可能有些慢,请大家见谅!!

THE MAKING OF 'JESTER'为Gnomonology 官方9月最新发布的教程,创造电影里的'JESTER' - 小丑角色.教程内容覆盖:Maya/ Zbrush/ Bodypaint/ Photoshop 等专业3D软件.官方网站相关信息:http://gnomonology.com/group/9
教学从个人最初草图开始,到它的发展,到三维制作和lifesize打印。这需要制作高分辨率细节和纹理,可以支持一个4000x6000像素的渲染,使“jester-小丑”达到电影特性。用maya,uvlayout ,zbrush ,bodypaint和photoshop ,' jester-小丑 '创作了60小时。观察和聆听由Alex分享他的操作,思考过程和技巧。
教程适用级别:中级/高级,讲解为资深专家:Alex Alvarez
Gnomonology The Making Of Jester (创造电影级小丑系列)包含以下部分:
1、Gnomonology The Making Of Jester - Base Mesh (创造电影级小丑系列之底部网格建设):
此为该系列的第一节和第二节部分,Chapter One And Two: Base Mesh-底部网格的创建,从最初的原始2D草图开始,图像被作为一个侧面视图平面带入Maya中,从底部网格几何体进行三维创造设计.
This 'making of' demonstration and lecture began with the decision to take a personal sketch, develop it in 3D and produce a lifesize print. This would require the development of high-resolution detail and textures that could hold up to a 4000x6000 pixel render, effectively making Jester a film-res character. Using Maya, UVlayout, Zbrush, Bodypaint and Photoshop, 'Jester' was created in 60 hours. Observe and listen as Alex shares his workflow, thought process and techniques.
Level: Intermediate/Advanced.
A working knowledge of Maya/ Zbrush/ Bodypaint/ Photoshop is required. While literally every step is shown and explained, it is not realistic to have this lecture also be an 'Intro to Photoshop' or an 'Intro to Zbrush', or else it would go on forever. I therefore assume that the student has seen the Gnomon intro lectures available on DVD or here at Gnomonology.
Chapter One And Two: Base Mesh
Beginning with a 2D sketch, the image is brought into Maya as a side view image plane. Without front or top views, Alex has to extrapolate the design into three dimensions as he creates the base mesh geometry. With the intention of sculpting the details in Zbrush, the requirements of the base mesh surfaces is twofold. First, they must follow the flow of the design lines to minimize the amount of subdivisions they will require in Zbrush and later on at render time. Second, they will hold the UV information for texturing.
Continuing with the base mesh construction, we complete the character and organize the separate meshes in preparation of UVlayout.
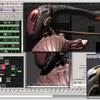
相关制作界面效果图如下:
2、Gnomonology The Making Of Jester-UV Layout Composition / Lighting (系列之UV贴图和合成灯光):
此为该系列的第三节,第四节和第五节部分,Chapter Three And Foru: UV Layout-UV贴图,Chapter Five: Composition / Lighting-合成和灯光
This 'making of' demonstration and lecture began with the decision to take a personal sketch, develop it in 3D and produce a lifesize print. This would require the development of high-resolution detail and textures that could hold up to a 4000x6000 pixel render, effectively making Jester a film-res character. Using Maya, UVlayout, Zbrush, Bodypaint and Photoshop, 'Jester' was created in 60 hours. Observe and listen as Alex shares his workflow, thought process and techniques.
Level: Intermediate/Advanced.
A working knowledge of Maya/ Zbrush/ Bodypaint/ Photoshop is required. While literally every step is shown and explained, it is not realistic to have this lecture also be an 'Intro to Photoshop' or an 'Intro to Zbrush', or else it would go on forever. I therefore assume that the student has seen the Gnomon intro lectures available on DVD or here at Gnomonology.
Chapter Three: UV Layout, part 1
Once the base mesh is complete, each surface must have its UVs unwrapped and laid out with a couple things in mind. First, the UVs should be unwrapped so that they are 'readable' when viewed in 2D. This allows for intuitive texturing in Photoshop. Second, the UV shells must maximize the use of UV space. While it is possible to layout UVS in Maya, I prefer to export each object to Headus UVlayout, a simple yet amazing application. Maya is then used to organize the UV shells. If you are unfamiliar with UVlayout, I highly recommend checking it out at http://www.headus.com. In my opinion the best program out there for UVs.
Chapter Four: UV Layout, part 2
In part two, we finish the unwrapping for the character, then import the objects back into Maya and prepare them for export to Zbrush. This process involves prepping/combining the objects so that symmetry sculpting is possible, while organizing the UVs in a way that Zbrush will support.
Chapter Five: Composition / Lighting
Before going to Zbrush, I choose to take a little time experimenting with possible composition and lighting options for Jester. Using Maya and the base mesh, I block out some quick options for the background while trying out different lighting schemes. This is done in order to see if I find a solution that would direct the amount of detail I need to create in Zbrush. I later go through this process again, in chapter eighteen, when I arrive at the final lighting and environment.
3、Gnomonology The Making Of Jester-Sculpting in Zbrush (系列之Zbrush雕刻造型):
此为该系列的第六节,第七节和第八节部分,Chapter Six,Seven And Eight:Sculpting in Zbrush -Zbrush中进行雕刻造型设计
This 'making of' demonstration and lecture began with the decision to take a personal sketch, develop it in 3D and produce a lifesize print. This would require the development of high-resolution detail and textures that could hold up to a 4000x6000 pixel render, effectively making Jester a film-res character. Using Maya, UVlayout, Zbrush, Bodypaint and Photoshop, 'Jester' was created in 60 hours. Observe and listen as Alex shares his workflow, thought process and techniques.
Level: Intermediate/Advanced.
A working knowledge of Maya/ Zbrush/ Bodypaint/ Photoshop is required. While literally every step is shown and explained, it is not realistic to have this lecture also be an 'Intro to Photoshop' or an 'Intro to Zbrush', or else it would go on forever. I therefore assume that the student has seen the Gnomon intro lectures available on DVD or here at Gnomonology.
Chapter Six: Sculpting in Zbrush, part 1
With roughly 30 components, each piece of Jester is imported into Zbrush for the creation of a single Ztool with multiple subtools. Sculpting then begins using a variety of brushes, alphas and tools. Part one includes the work done on all the hard surface head components, as well as the anatomical torso sculpting.
Chapter Seven: Sculpting in Zbrush, part 2
In part two, sculpting continues, now working on the corset, corset inserts, hands, boots, wrist guards, elbow guards, forearm and kickstand.
Chapter Eight: Sculpting in Zbrush, part 3
Sculpting continues, now working on the legs, hands and various boot components. Once sculpting is complete, we are ready to export Jester back to Maya. For each subtool we determine the best resolution to export, based on the silhouette, then export both OBJ's and normal maps using Zmapper.
4、Gnomonology The Making Of Jester-Maya Shader Set-up (系列之Maya PS和bodypaint设置):
此为该系列的第九节,第十节和第十一节部分,Chapter Nine: Maya Shader Set-up-Maya阴影设置,Chapter Ten: Photoshop Color Study-PS颜色处理,Chapter Eleven: Bodypaint / Maya Set-up-Bodypaint / Maya设置
This 'making of' demonstration and lecture began with the decision to take a personal sketch, develop it in 3D and produce a lifesize print. This would require the development of high-resolution detail and textures that could hold up to a 4000x6000 pixel render, effectively making Jester a film-res character. Using Maya, UVlayout, Zbrush, Bodypaint and Photoshop, 'Jester' was created in 60 hours. Observe and listen as Alex shares his workflow, thought process and techniques.
Level: Intermediate/Advanced.
A working knowledge of Maya/ Zbrush/ Bodypaint/ Photoshop is required. While literally every step is shown and explained, it is not realistic to have this lecture also be an 'Intro to Photoshop' or an 'Intro to Zbrush', or else it would go on forever. I therefore assume that the student has seen the Gnomon intro lectures available on DVD or here at Gnomonology.
Chapter Nine: Maya Shader Set-up
The separate meshes (obj's) and normal maps are imported into Maya. Shaders are created for all of Jester's components and the normal maps are assigned. We get Jester to the point that he renders in Maya looking as he did in Zbrush, using normal maps exclusively (no displacements). Shader settings are blocked out in order to indicate the different types of materials.
Chapter Ten: Photoshop Color Study
Taking a Maya render of Jester into Photoshop, I quickly create a couple directions for how Jester could look in regards to lighting, color and material. This is a fun step that motivates me to begin the process of texturing. The Maya render provides me with form, shadow and value variation across surfaces, but straight out of Maya it is boring. In Photoshop I create overlay and multiply layers, using painting, gradients, textures and HSV/Levels adjustments to arrive at potential color palettes.
Chapter Eleven: Bodypaint / Maya Set-up
This chapter is a useful demonstration of how to take a multi-component object, such as Jester's boot, from Maya to Bodypaint and back. The various materials and textures are created in Bodypaint and exported to Jester's Maya project, for a back and forth workflow between Photoshop, Maya and occasionally Bodypaint. While an exchange plug-in exists between Maya and Bodypaint, I never use it. It is usually a version behind Maya, and with Photoshop such a big part of the equation, I prefer my workflow.
5、Gnomonology The Making Of Jester-Texturing (系列之纹理贴图):
此为该系列的第十二,十三,十四,十五,十六,十七节部分,Chapter Twelve,Thirteen,Fourteen,Fifteen,Sixteen,Seventeen: Texturing-纹理贴图
This 'making of' demonstration and lecture began with the decision to take a personal sketch, develop it in 3D and produce a lifesize print. This would require the development of high-resolution detail and textures that could hold up to a 4000x6000 pixel render, effectively making Jester a film-res character. Using Maya, UVlayout, Zbrush, Bodypaint and Photoshop, 'Jester' was created in 60 hours. Observe and listen as Alex shares his workflow, thought process and techniques.
Level: Intermediate/Advanced.
A working knowledge of Maya/ Zbrush/ Bodypaint/ Photoshop is required. While literally every step is shown and explained, it is not realistic to have this lecture also be an 'Intro to Photoshop' or an 'Intro to Zbrush', or else it would go on forever. I therefore assume that the student has seen the Gnomon intro lectures available on DVD or here at Gnomonology.
Chapter Twelve: Texturing, part 1
Texturing Jester's many pieces involves a constant back and forth process between Photoshop and Maya, as the individual component maps were designed and tweaked. Each object has its own customized color, bump and specular maps, so that while I create the textures, I am also building and designing the shader networks. In part one we texture most of the boot. As you will see, the techniques employed for Jester primarily involve the use of photographs and scans from my texture library. These textures are warped, liquified, color corrected and blended to fit the UV layouts for each object. Using photographs ensures a photo-real result.
Chapter Thirteen: Texturing, part 2
The boots are completed as well as the legs/pants. The initial sketch in projected onto the leg geometry as a guide for texturing in Photoshop. Scans of canvas, straps and pockets are combined for the final texture. The staples along the pant legs are modeled and positioned in Maya, then exported to Zbrush. The pant seams and staple holes are sculpted in Zbrush, and a new base mesh plus normal map is exported to Maya.
Chapter Fourteen: Texturing, part 3
The Elbow Guard, Wrist Guard, Forearm, Lights and Kickstand are all textured. Maya, Zbrush, Photoshop, Crazybump (for cavity maps) and Bodypaint are used. The lights involve the creation of Maya point lights, shader translucency, softshadows and ramp based color remapping. Crazy bump is available atwww.crazybump.com.
Chapter Fifteen: Texturing, part 4
In chapter fifteen we texture the hands and the corset. The hands were initially going to be skin, but once I got to texturing I decided that Jester should be wearing gloves. Using leather scans, as well as some dirt and grime maps, the glove is textured in Photoshop and the shaders tweaked in Maya. The corset was an involved process, due to the various materials I chose to incorporate on the surface. Each component of the corset PSD had to have its color, bump and spec maps individually tweaked to work with a single shader.
Chapter Sixteen: Texturing, part 5
In chapter sixteen, we texture and develop the shaders for the faceplate, headpiece, rope and eyes. The faceplate uses a layered shader with a fresnel effect to simulate a metallic surface with a clear coat. The headpiece components are textured using images of metal, canvas and dirt/grime. The eyes, although not visibile in the final render, are modeled and textured. The rope is also textured, and a UV technique is demonstrated that allows a tileable texture to be repeated without stretching, even though the rope mesh divisions are unevenly spaced.
Chapter Seventeen: Texturing, part 6
This chapter is devoted primarily to the torso. I begin by creating a skin shader and showing how to link it to multiple surfaces (torso, face, back of head) by layering textures and offsetting UVs. The SSS settings are blocked out and a Photoshop paintover is created as a guide for texturing and further SSS tweaks. Zbrush polypainting is used to create the base texture. Photoshop and Bodypaint are used for the rest.
6、Gnomonology The Making Of Jester-The Environment (系列之环境和结尾设置):
此为该系列的第十八节和最后一节Chapter Eighteen:The Environment-环境设置,Chapter Nineteen: The End is Near-临界结束工作
This 'making of' demonstration and lecture began with the decision to take a personal sketch, develop it in 3D and produce a lifesize print. This would require the development of high-resolution detail and textures that could hold up to a 4000x6000 pixel render, effectively making Jester a film-res character. Using Maya, UVlayout, Zbrush, Bodypaint and Photoshop, 'Jester' was created in 60 hours. Observe and listen as Alex shares his workflow, thought process and techniques.
Level: Intermediate/Advanced.
A working knowledge of Maya/ Zbrush/ Bodypaint/ Photoshop is required. While literally every step is shown and explained, it is not realistic to have this lecture also be an 'Intro to Photoshop' or an 'Intro to Zbrush', or else it would go on forever. I therefore assume that the student has seen the Gnomon intro lectures available on DVD or here at Gnomonology.
Chapter Eighteen: The Environment
Jester, 'the character', is virtually finished. What I now need to develop is the lighting and an appropriate setting for him... in order to have Jester 'the image'. I first show how to manage textures, so that our lighting tests render quickly. I then begin by trying out different lighting styles using both HDR and direct lighting. Settling on direct lighting, I model and texture a simple set consisting of a floor, wall and hatch. The lighting is then finalized using a combination of spot, directional and area lights.
Chapter Nineteen: The End is Near
Time to wrap things up with Jester. I begin by taking a little time to create a skeleton and quick rig, in order to see if I like him posed. While I end up not choosing to use it, it does help me realize that there should be some sort of prop. I create a couple of metal toy balls to put on the floor, and then begin assembling the final Photoshop composition. Some smoke is added behind him to help define his silhouette. At this point I am actually happy enough with the image to call it done and prepare it for print. While it is difficult to ever consider an image finished, I have to let go
7、Gnomonology rigging 101 skeletons: Jester (Jester角色骨架动画设定):
Gnomonology rigging 101 skeletons 电影级小丑'Jester'角色骨架搭建教程.下载过Gnomonology The Making Of Jester系列的网友相信对小丑'Jester'角色一定不会陌生吧
设定任何角色或创造物的第一步是要建立一个骨架,然后创建相关的关联.建立了骨架的最终目的将用于蒙皮和动画制作等
教学在原Gnomonology The Making Of Jester创建' jester-小丑 '角色的基础上,对其进行角色的绑定与设定. 观察和聆听由Alex分享他的操作,思考过程和技巧。
教程适用级别:中级/高级,讲解为资深专家:Alex Alvarez
官方网站相关信息:http://gnomonology.com/group/19
The first step of rigging any character or creature is to build a skeleton. This lecture explains, in detail, everything that you need to know in order to create rig friendly joints. Using the character 'Jester' as our example, we create the skeleton that will be used for skinning and animation. Each of the joint creation tools is discussed, with an emphasis on how joint placement and orientation will affect rig behavior later on. Once Inverse Kinematic controls have been applied and the geometry has been skinned, these things are hard to change. Therefore, it is critical that the skeleton creation process is methodical.
Chapter One: Joint Creation Fundamentals
We begin by discussing the core concepts of skeleton creation: how to create joint chains and manage hierarchies, IK versus FK, and how to test behavior with a quick IK rig.
Chapter Two: Creating Jester's Skeleton
In this chapter we create Jester's skeleton in realtime, while explaining all of the required steps to ensure proper behavior down the road.
Chapter Three: Clean Up
With Jester's skeleton created, we now clean it up and prepare it for skinning and control rigs. At this point you will know everything you need to know in order to create skeletons for your own characters or creatures.
2DVD
这个好像没有人发过,我也是刚搞到得,
发上来和大家共享一下好了,由于网速原因可能有些慢,请大家见谅!!
THE MAKING OF 'JESTER'为Gnomonology 官方9月最新发布的教程,创造电影里的'JESTER' - 小丑角色.教程内容覆盖:Maya/ Zbrush/ Bodypaint/ Photoshop 等专业3D软件.官方网站相关信息:http://gnomonology.com/group/9
教学从个人最初草图开始,到它的发展,到三维制作和lifesize打印。这需要制作高分辨率细节和纹理,可以支持一个4000x6000像素的渲染,使“jester-小丑”达到电影特性。用maya,uvlayout ,zbrush ,bodypaint和photoshop ,' jester-小丑 '创作了60小时。观察和聆听由Alex分享他的操作,思考过程和技巧。
教程适用级别:中级/高级,讲解为资深专家:Alex Alvarez
Gnomonology The Making Of Jester (创造电影级小丑系列)包含以下部分:
1、Gnomonology The Making Of Jester - Base Mesh (创造电影级小丑系列之底部网格建设):
此为该系列的第一节和第二节部分,Chapter One And Two: Base Mesh-底部网格的创建,从最初的原始2D草图开始,图像被作为一个侧面视图平面带入Maya中,从底部网格几何体进行三维创造设计.
This 'making of' demonstration and lecture began with the decision to take a personal sketch, develop it in 3D and produce a lifesize print. This would require the development of high-resolution detail and textures that could hold up to a 4000x6000 pixel render, effectively making Jester a film-res character. Using Maya, UVlayout, Zbrush, Bodypaint and Photoshop, 'Jester' was created in 60 hours. Observe and listen as Alex shares his workflow, thought process and techniques.
Level: Intermediate/Advanced.
A working knowledge of Maya/ Zbrush/ Bodypaint/ Photoshop is required. While literally every step is shown and explained, it is not realistic to have this lecture also be an 'Intro to Photoshop' or an 'Intro to Zbrush', or else it would go on forever. I therefore assume that the student has seen the Gnomon intro lectures available on DVD or here at Gnomonology.
Chapter One And Two: Base Mesh
Beginning with a 2D sketch, the image is brought into Maya as a side view image plane. Without front or top views, Alex has to extrapolate the design into three dimensions as he creates the base mesh geometry. With the intention of sculpting the details in Zbrush, the requirements of the base mesh surfaces is twofold. First, they must follow the flow of the design lines to minimize the amount of subdivisions they will require in Zbrush and later on at render time. Second, they will hold the UV information for texturing.
Continuing with the base mesh construction, we complete the character and organize the separate meshes in preparation of UVlayout.
相关制作界面效果图如下:
2、Gnomonology The Making Of Jester-UV Layout Composition / Lighting (系列之UV贴图和合成灯光):
此为该系列的第三节,第四节和第五节部分,Chapter Three And Foru: UV Layout-UV贴图,Chapter Five: Composition / Lighting-合成和灯光
This 'making of' demonstration and lecture began with the decision to take a personal sketch, develop it in 3D and produce a lifesize print. This would require the development of high-resolution detail and textures that could hold up to a 4000x6000 pixel render, effectively making Jester a film-res character. Using Maya, UVlayout, Zbrush, Bodypaint and Photoshop, 'Jester' was created in 60 hours. Observe and listen as Alex shares his workflow, thought process and techniques.
Level: Intermediate/Advanced.
A working knowledge of Maya/ Zbrush/ Bodypaint/ Photoshop is required. While literally every step is shown and explained, it is not realistic to have this lecture also be an 'Intro to Photoshop' or an 'Intro to Zbrush', or else it would go on forever. I therefore assume that the student has seen the Gnomon intro lectures available on DVD or here at Gnomonology.
Chapter Three: UV Layout, part 1
Once the base mesh is complete, each surface must have its UVs unwrapped and laid out with a couple things in mind. First, the UVs should be unwrapped so that they are 'readable' when viewed in 2D. This allows for intuitive texturing in Photoshop. Second, the UV shells must maximize the use of UV space. While it is possible to layout UVS in Maya, I prefer to export each object to Headus UVlayout, a simple yet amazing application. Maya is then used to organize the UV shells. If you are unfamiliar with UVlayout, I highly recommend checking it out at http://www.headus.com. In my opinion the best program out there for UVs.
Chapter Four: UV Layout, part 2
In part two, we finish the unwrapping for the character, then import the objects back into Maya and prepare them for export to Zbrush. This process involves prepping/combining the objects so that symmetry sculpting is possible, while organizing the UVs in a way that Zbrush will support.
Chapter Five: Composition / Lighting
Before going to Zbrush, I choose to take a little time experimenting with possible composition and lighting options for Jester. Using Maya and the base mesh, I block out some quick options for the background while trying out different lighting schemes. This is done in order to see if I find a solution that would direct the amount of detail I need to create in Zbrush. I later go through this process again, in chapter eighteen, when I arrive at the final lighting and environment.
3、Gnomonology The Making Of Jester-Sculpting in Zbrush (系列之Zbrush雕刻造型):
此为该系列的第六节,第七节和第八节部分,Chapter Six,Seven And Eight:Sculpting in Zbrush -Zbrush中进行雕刻造型设计
This 'making of' demonstration and lecture began with the decision to take a personal sketch, develop it in 3D and produce a lifesize print. This would require the development of high-resolution detail and textures that could hold up to a 4000x6000 pixel render, effectively making Jester a film-res character. Using Maya, UVlayout, Zbrush, Bodypaint and Photoshop, 'Jester' was created in 60 hours. Observe and listen as Alex shares his workflow, thought process and techniques.
Level: Intermediate/Advanced.
A working knowledge of Maya/ Zbrush/ Bodypaint/ Photoshop is required. While literally every step is shown and explained, it is not realistic to have this lecture also be an 'Intro to Photoshop' or an 'Intro to Zbrush', or else it would go on forever. I therefore assume that the student has seen the Gnomon intro lectures available on DVD or here at Gnomonology.
Chapter Six: Sculpting in Zbrush, part 1
With roughly 30 components, each piece of Jester is imported into Zbrush for the creation of a single Ztool with multiple subtools. Sculpting then begins using a variety of brushes, alphas and tools. Part one includes the work done on all the hard surface head components, as well as the anatomical torso sculpting.
Chapter Seven: Sculpting in Zbrush, part 2
In part two, sculpting continues, now working on the corset, corset inserts, hands, boots, wrist guards, elbow guards, forearm and kickstand.
Chapter Eight: Sculpting in Zbrush, part 3
Sculpting continues, now working on the legs, hands and various boot components. Once sculpting is complete, we are ready to export Jester back to Maya. For each subtool we determine the best resolution to export, based on the silhouette, then export both OBJ's and normal maps using Zmapper.
4、Gnomonology The Making Of Jester-Maya Shader Set-up (系列之Maya PS和bodypaint设置):
此为该系列的第九节,第十节和第十一节部分,Chapter Nine: Maya Shader Set-up-Maya阴影设置,Chapter Ten: Photoshop Color Study-PS颜色处理,Chapter Eleven: Bodypaint / Maya Set-up-Bodypaint / Maya设置
This 'making of' demonstration and lecture began with the decision to take a personal sketch, develop it in 3D and produce a lifesize print. This would require the development of high-resolution detail and textures that could hold up to a 4000x6000 pixel render, effectively making Jester a film-res character. Using Maya, UVlayout, Zbrush, Bodypaint and Photoshop, 'Jester' was created in 60 hours. Observe and listen as Alex shares his workflow, thought process and techniques.
Level: Intermediate/Advanced.
A working knowledge of Maya/ Zbrush/ Bodypaint/ Photoshop is required. While literally every step is shown and explained, it is not realistic to have this lecture also be an 'Intro to Photoshop' or an 'Intro to Zbrush', or else it would go on forever. I therefore assume that the student has seen the Gnomon intro lectures available on DVD or here at Gnomonology.
Chapter Nine: Maya Shader Set-up
The separate meshes (obj's) and normal maps are imported into Maya. Shaders are created for all of Jester's components and the normal maps are assigned. We get Jester to the point that he renders in Maya looking as he did in Zbrush, using normal maps exclusively (no displacements). Shader settings are blocked out in order to indicate the different types of materials.
Chapter Ten: Photoshop Color Study
Taking a Maya render of Jester into Photoshop, I quickly create a couple directions for how Jester could look in regards to lighting, color and material. This is a fun step that motivates me to begin the process of texturing. The Maya render provides me with form, shadow and value variation across surfaces, but straight out of Maya it is boring. In Photoshop I create overlay and multiply layers, using painting, gradients, textures and HSV/Levels adjustments to arrive at potential color palettes.
Chapter Eleven: Bodypaint / Maya Set-up
This chapter is a useful demonstration of how to take a multi-component object, such as Jester's boot, from Maya to Bodypaint and back. The various materials and textures are created in Bodypaint and exported to Jester's Maya project, for a back and forth workflow between Photoshop, Maya and occasionally Bodypaint. While an exchange plug-in exists between Maya and Bodypaint, I never use it. It is usually a version behind Maya, and with Photoshop such a big part of the equation, I prefer my workflow.
5、Gnomonology The Making Of Jester-Texturing (系列之纹理贴图):
此为该系列的第十二,十三,十四,十五,十六,十七节部分,Chapter Twelve,Thirteen,Fourteen,Fifteen,Sixteen,Seventeen: Texturing-纹理贴图
This 'making of' demonstration and lecture began with the decision to take a personal sketch, develop it in 3D and produce a lifesize print. This would require the development of high-resolution detail and textures that could hold up to a 4000x6000 pixel render, effectively making Jester a film-res character. Using Maya, UVlayout, Zbrush, Bodypaint and Photoshop, 'Jester' was created in 60 hours. Observe and listen as Alex shares his workflow, thought process and techniques.
Level: Intermediate/Advanced.
A working knowledge of Maya/ Zbrush/ Bodypaint/ Photoshop is required. While literally every step is shown and explained, it is not realistic to have this lecture also be an 'Intro to Photoshop' or an 'Intro to Zbrush', or else it would go on forever. I therefore assume that the student has seen the Gnomon intro lectures available on DVD or here at Gnomonology.
Chapter Twelve: Texturing, part 1
Texturing Jester's many pieces involves a constant back and forth process between Photoshop and Maya, as the individual component maps were designed and tweaked. Each object has its own customized color, bump and specular maps, so that while I create the textures, I am also building and designing the shader networks. In part one we texture most of the boot. As you will see, the techniques employed for Jester primarily involve the use of photographs and scans from my texture library. These textures are warped, liquified, color corrected and blended to fit the UV layouts for each object. Using photographs ensures a photo-real result.
Chapter Thirteen: Texturing, part 2
The boots are completed as well as the legs/pants. The initial sketch in projected onto the leg geometry as a guide for texturing in Photoshop. Scans of canvas, straps and pockets are combined for the final texture. The staples along the pant legs are modeled and positioned in Maya, then exported to Zbrush. The pant seams and staple holes are sculpted in Zbrush, and a new base mesh plus normal map is exported to Maya.
Chapter Fourteen: Texturing, part 3
The Elbow Guard, Wrist Guard, Forearm, Lights and Kickstand are all textured. Maya, Zbrush, Photoshop, Crazybump (for cavity maps) and Bodypaint are used. The lights involve the creation of Maya point lights, shader translucency, softshadows and ramp based color remapping. Crazy bump is available atwww.crazybump.com.
Chapter Fifteen: Texturing, part 4
In chapter fifteen we texture the hands and the corset. The hands were initially going to be skin, but once I got to texturing I decided that Jester should be wearing gloves. Using leather scans, as well as some dirt and grime maps, the glove is textured in Photoshop and the shaders tweaked in Maya. The corset was an involved process, due to the various materials I chose to incorporate on the surface. Each component of the corset PSD had to have its color, bump and spec maps individually tweaked to work with a single shader.
Chapter Sixteen: Texturing, part 5
In chapter sixteen, we texture and develop the shaders for the faceplate, headpiece, rope and eyes. The faceplate uses a layered shader with a fresnel effect to simulate a metallic surface with a clear coat. The headpiece components are textured using images of metal, canvas and dirt/grime. The eyes, although not visibile in the final render, are modeled and textured. The rope is also textured, and a UV technique is demonstrated that allows a tileable texture to be repeated without stretching, even though the rope mesh divisions are unevenly spaced.
Chapter Seventeen: Texturing, part 6
This chapter is devoted primarily to the torso. I begin by creating a skin shader and showing how to link it to multiple surfaces (torso, face, back of head) by layering textures and offsetting UVs. The SSS settings are blocked out and a Photoshop paintover is created as a guide for texturing and further SSS tweaks. Zbrush polypainting is used to create the base texture. Photoshop and Bodypaint are used for the rest.
6、Gnomonology The Making Of Jester-The Environment (系列之环境和结尾设置):
此为该系列的第十八节和最后一节Chapter Eighteen:The Environment-环境设置,Chapter Nineteen: The End is Near-临界结束工作
This 'making of' demonstration and lecture began with the decision to take a personal sketch, develop it in 3D and produce a lifesize print. This would require the development of high-resolution detail and textures that could hold up to a 4000x6000 pixel render, effectively making Jester a film-res character. Using Maya, UVlayout, Zbrush, Bodypaint and Photoshop, 'Jester' was created in 60 hours. Observe and listen as Alex shares his workflow, thought process and techniques.
Level: Intermediate/Advanced.
A working knowledge of Maya/ Zbrush/ Bodypaint/ Photoshop is required. While literally every step is shown and explained, it is not realistic to have this lecture also be an 'Intro to Photoshop' or an 'Intro to Zbrush', or else it would go on forever. I therefore assume that the student has seen the Gnomon intro lectures available on DVD or here at Gnomonology.
Chapter Eighteen: The Environment
Jester, 'the character', is virtually finished. What I now need to develop is the lighting and an appropriate setting for him... in order to have Jester 'the image'. I first show how to manage textures, so that our lighting tests render quickly. I then begin by trying out different lighting styles using both HDR and direct lighting. Settling on direct lighting, I model and texture a simple set consisting of a floor, wall and hatch. The lighting is then finalized using a combination of spot, directional and area lights.
Chapter Nineteen: The End is Near
Time to wrap things up with Jester. I begin by taking a little time to create a skeleton and quick rig, in order to see if I like him posed. While I end up not choosing to use it, it does help me realize that there should be some sort of prop. I create a couple of metal toy balls to put on the floor, and then begin assembling the final Photoshop composition. Some smoke is added behind him to help define his silhouette. At this point I am actually happy enough with the image to call it done and prepare it for print. While it is difficult to ever consider an image finished, I have to let go
7、Gnomonology rigging 101 skeletons: Jester (Jester角色骨架动画设定):
Gnomonology rigging 101 skeletons 电影级小丑'Jester'角色骨架搭建教程.下载过Gnomonology The Making Of Jester系列的网友相信对小丑'Jester'角色一定不会陌生吧
设定任何角色或创造物的第一步是要建立一个骨架,然后创建相关的关联.建立了骨架的最终目的将用于蒙皮和动画制作等
教学在原Gnomonology The Making Of Jester创建' jester-小丑 '角色的基础上,对其进行角色的绑定与设定. 观察和聆听由Alex分享他的操作,思考过程和技巧。
教程适用级别:中级/高级,讲解为资深专家:Alex Alvarez
官方网站相关信息:http://gnomonology.com/group/19
The first step of rigging any character or creature is to build a skeleton. This lecture explains, in detail, everything that you need to know in order to create rig friendly joints. Using the character 'Jester' as our example, we create the skeleton that will be used for skinning and animation. Each of the joint creation tools is discussed, with an emphasis on how joint placement and orientation will affect rig behavior later on. Once Inverse Kinematic controls have been applied and the geometry has been skinned, these things are hard to change. Therefore, it is critical that the skeleton creation process is methodical.
Chapter One: Joint Creation Fundamentals
We begin by discussing the core concepts of skeleton creation: how to create joint chains and manage hierarchies, IK versus FK, and how to test behavior with a quick IK rig.
Chapter Two: Creating Jester's Skeleton
In this chapter we create Jester's skeleton in realtime, while explaining all of the required steps to ensure proper behavior down the road.
Chapter Three: Clean Up
With Jester's skeleton created, we now clean it up and prepare it for skinning and control rigs. At this point you will know everything you need to know in order to create skeletons for your own characters or creatures.
2DVD